- Drawings by Brooks Kim
- Posts
- How I Build a Portrait — Step by Step
How I Build a Portrait — Step by Step
From a simple sphere to a finished face.
brooks kim
July 09, 2025
This time, I wanted to show a more casual step-by-step breakdown of how I build a drawing. It's the structure I rely on most often—and the one I keep adjusting and evolving over time. It basically starts with the Loomis head construction method, where the focus is placed on orientation and structure before jumping into detailed features.
You can see the reference I used here on Pinterest.
1. Basic Loomis Head Structure Everything starts with a simplified Loomis head. It’s a great way to anchor the overall shape and perspective. I sketch a sphere, slice off the side, and lay down basic guides for the brow, centerline, and jaw angle.
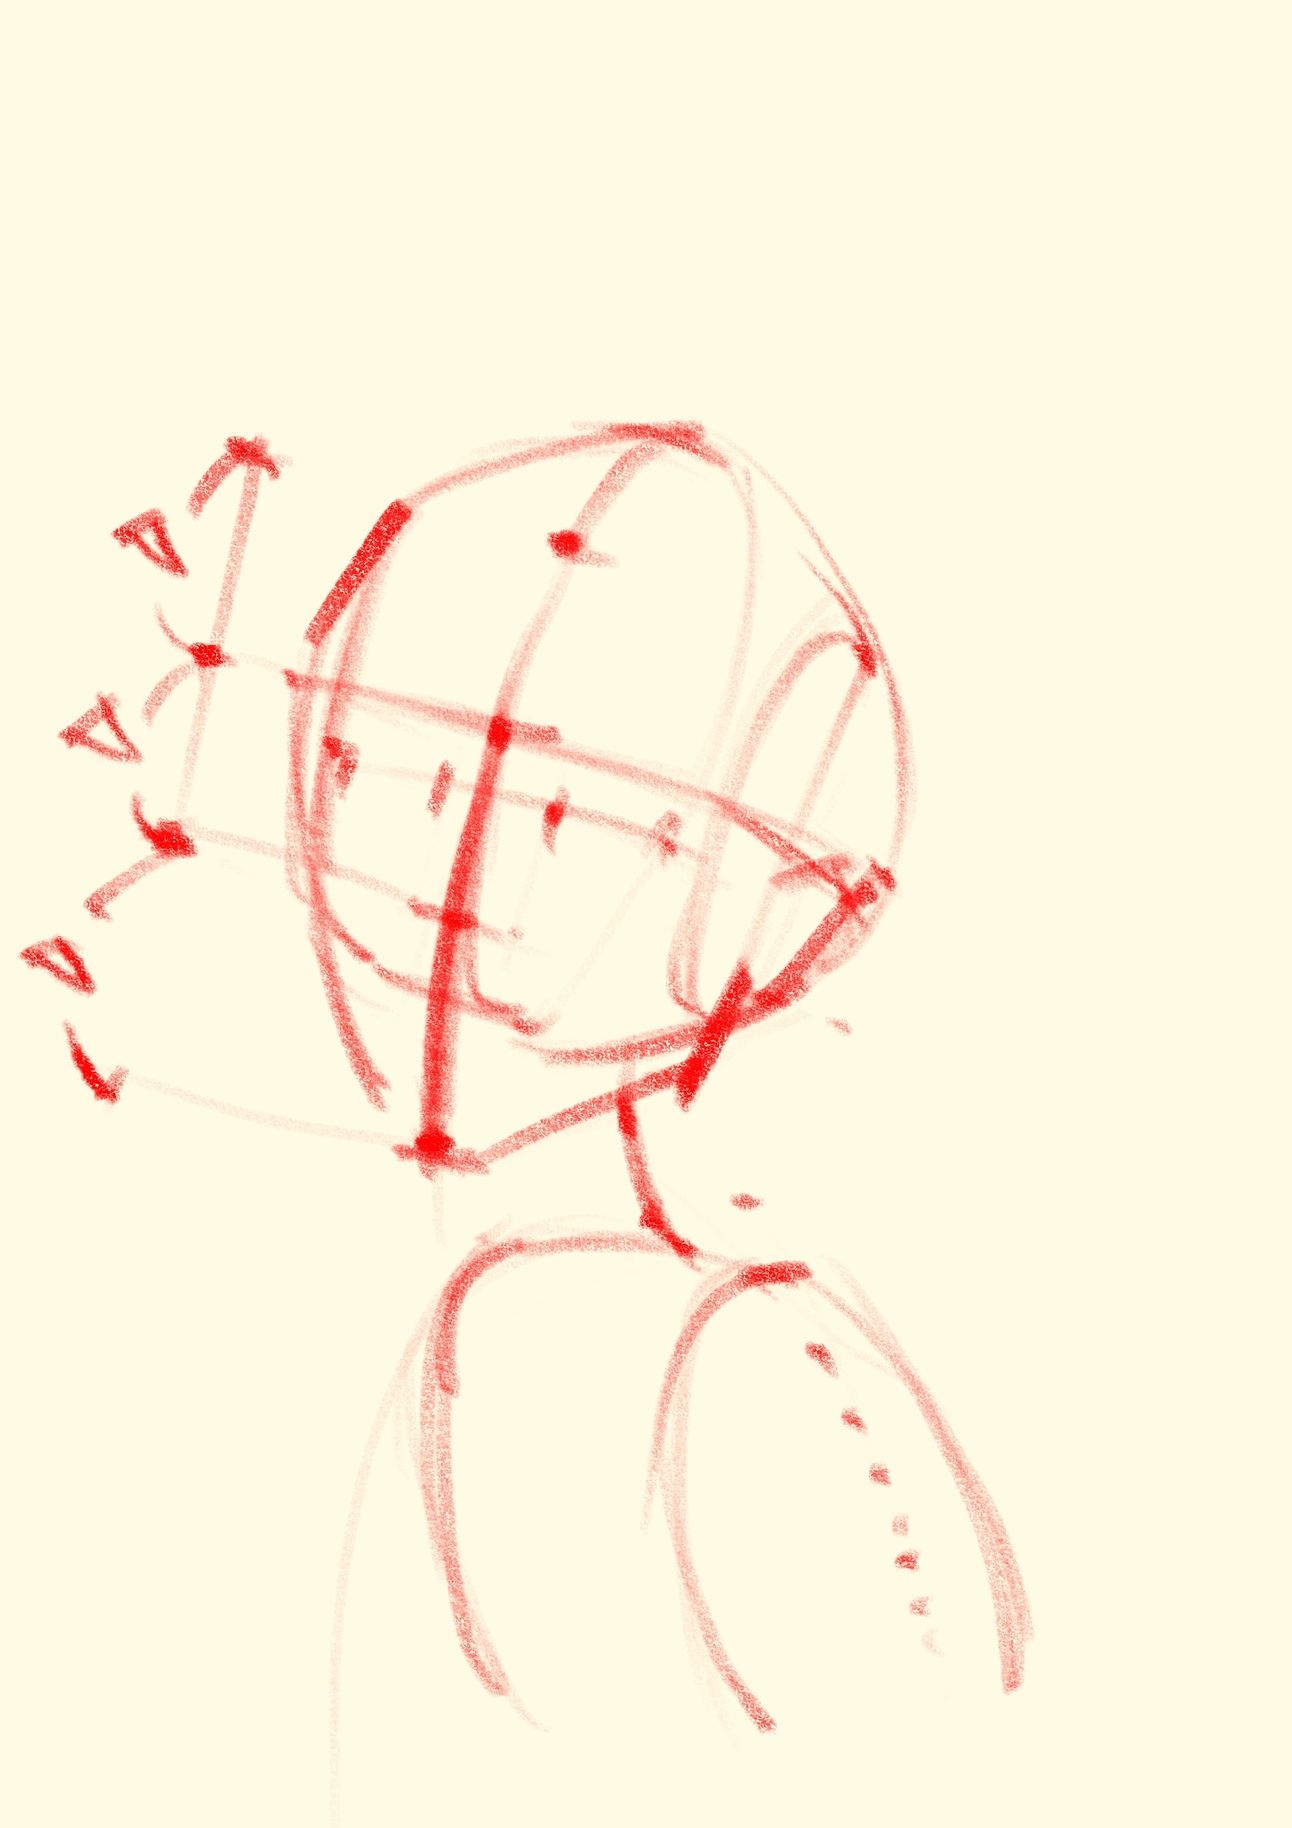

2. Plane Construction I draw the major planes—front, side, and underside. They help me find the volume and guide the rest of the face.
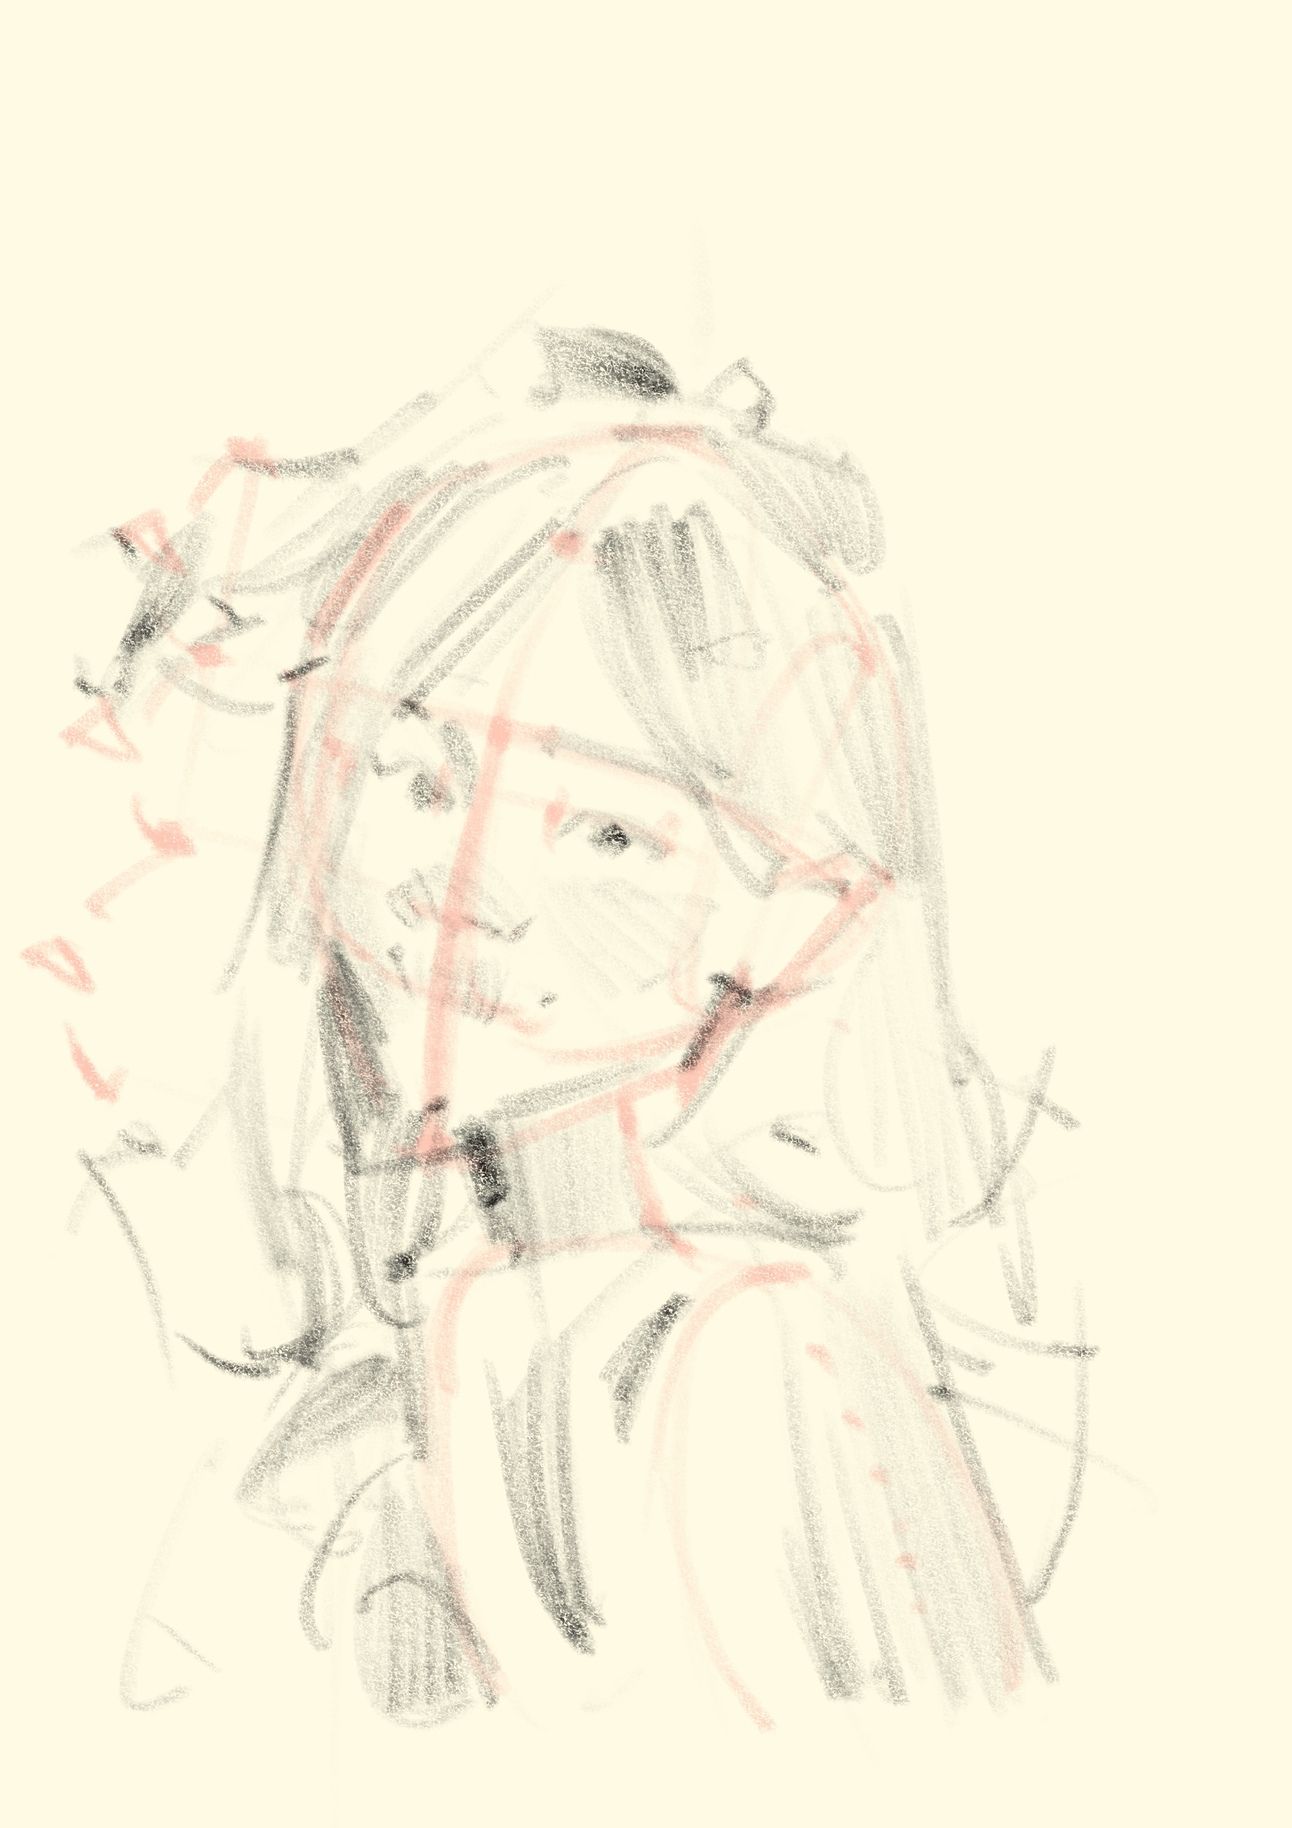
3. Blocking in Features I place the eyes, nose, mouth very loosely. I’m not concerned with perfection—just balance and expression. At this point I may also roughly indicate hair and the neckline.
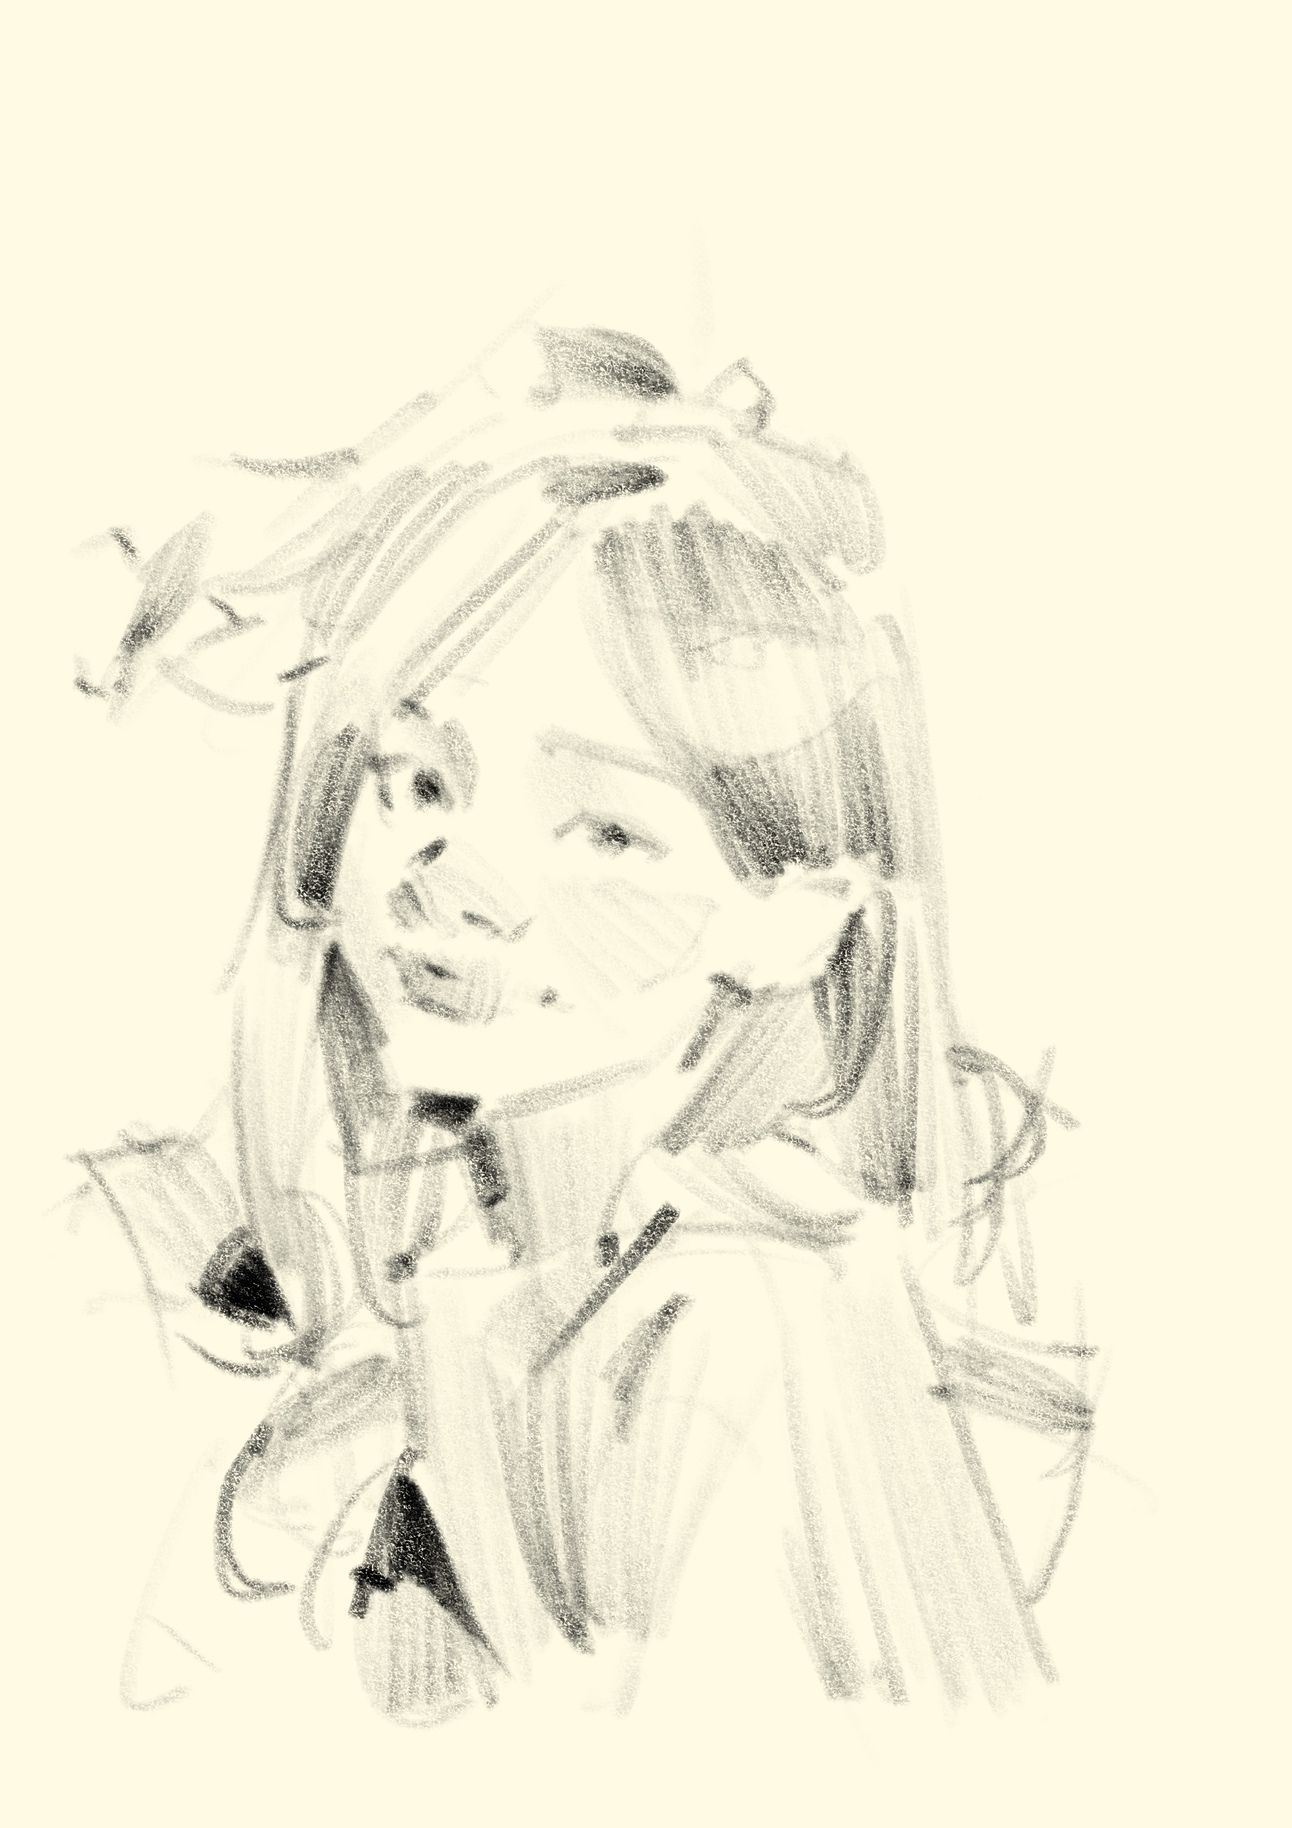
4. Shaping with Value I begin switching to darker pencil strokes. The shadows around the eyes, cheek, and neck help me sculpt the form. I’m still not chasing detail—just large shapes and light direction.
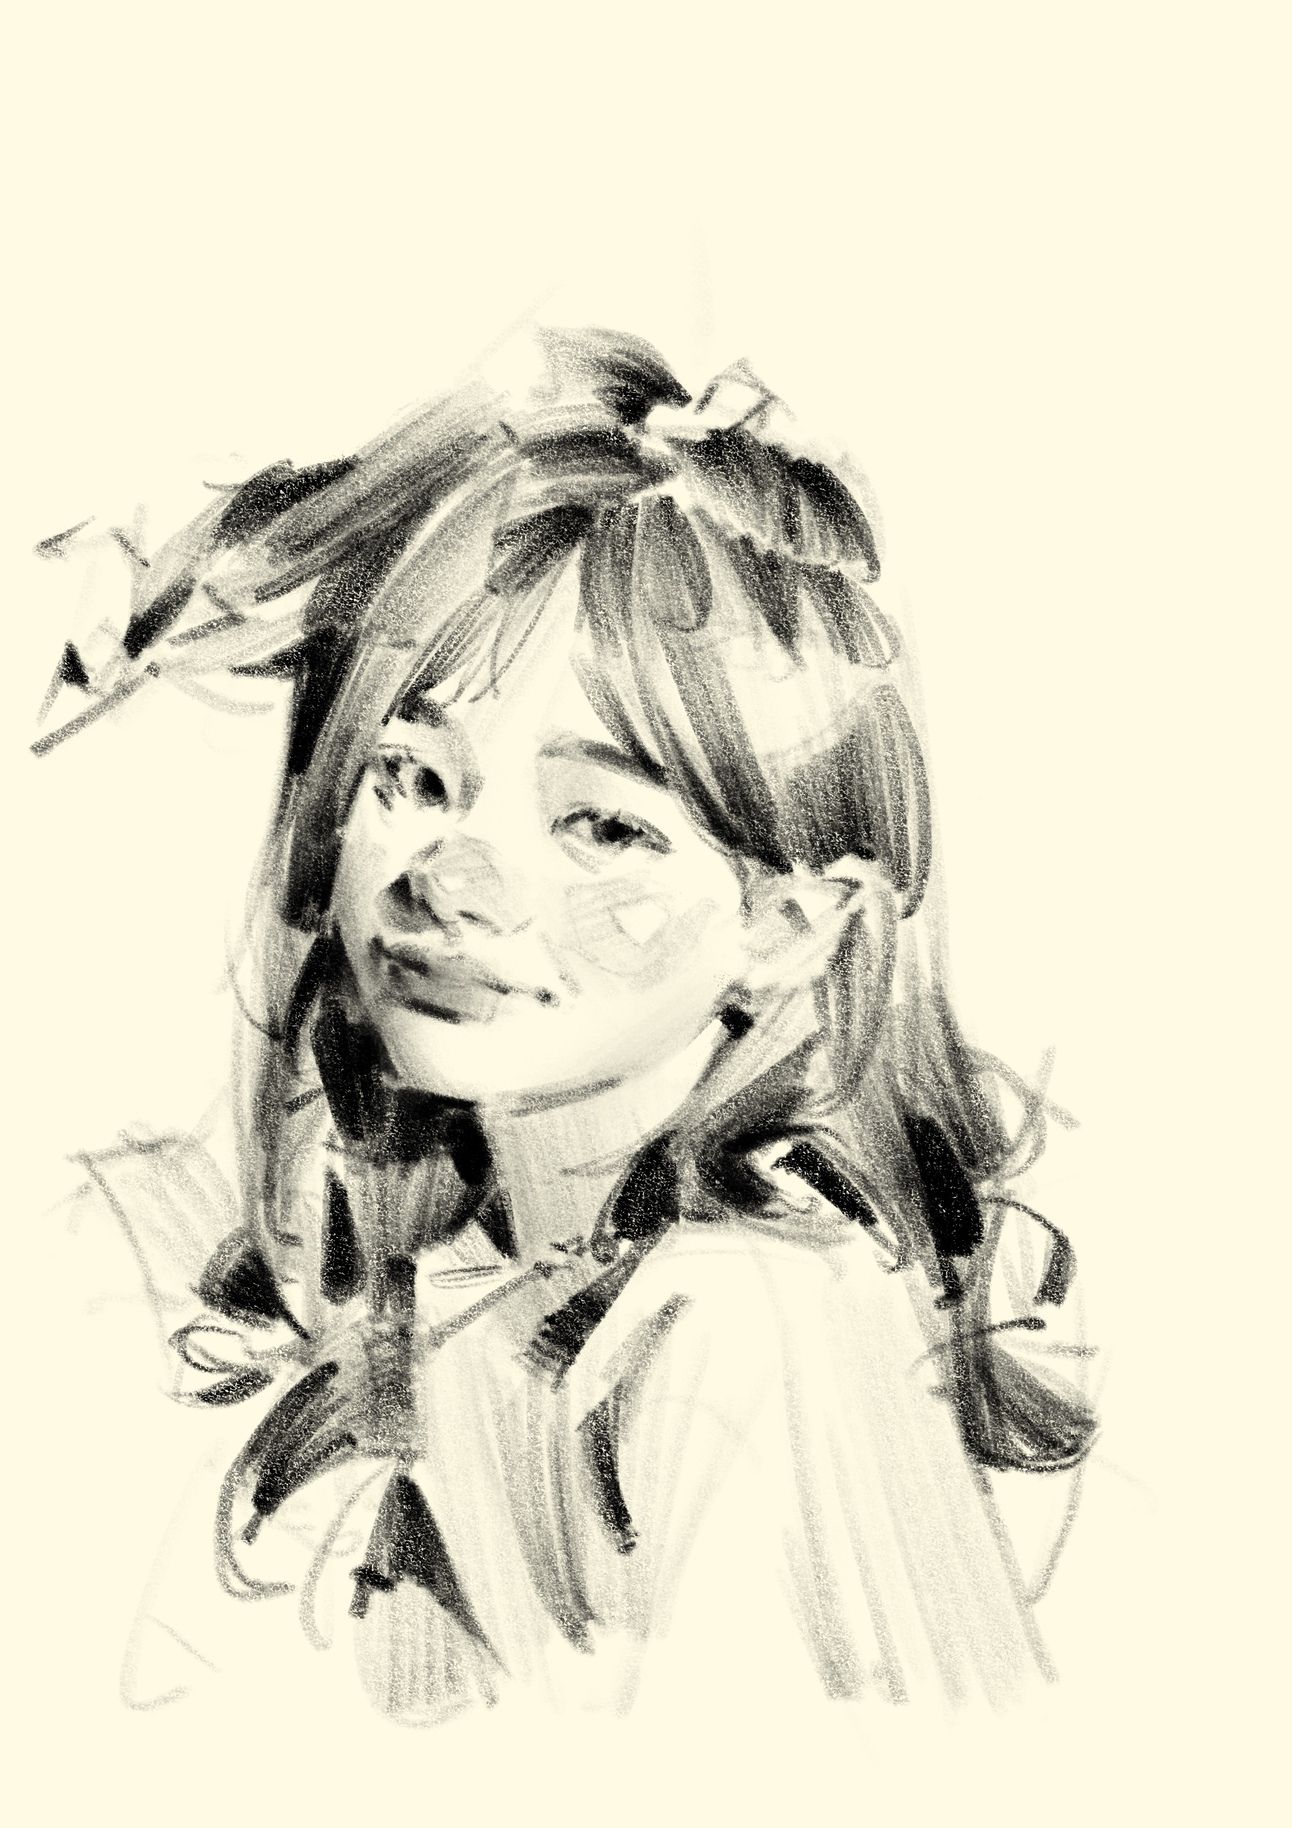
5. Final Pass I now clarify edges, refine the features, and push focal points. Some parts stay sketchy, but I aim for just enough finish to feel resolved.
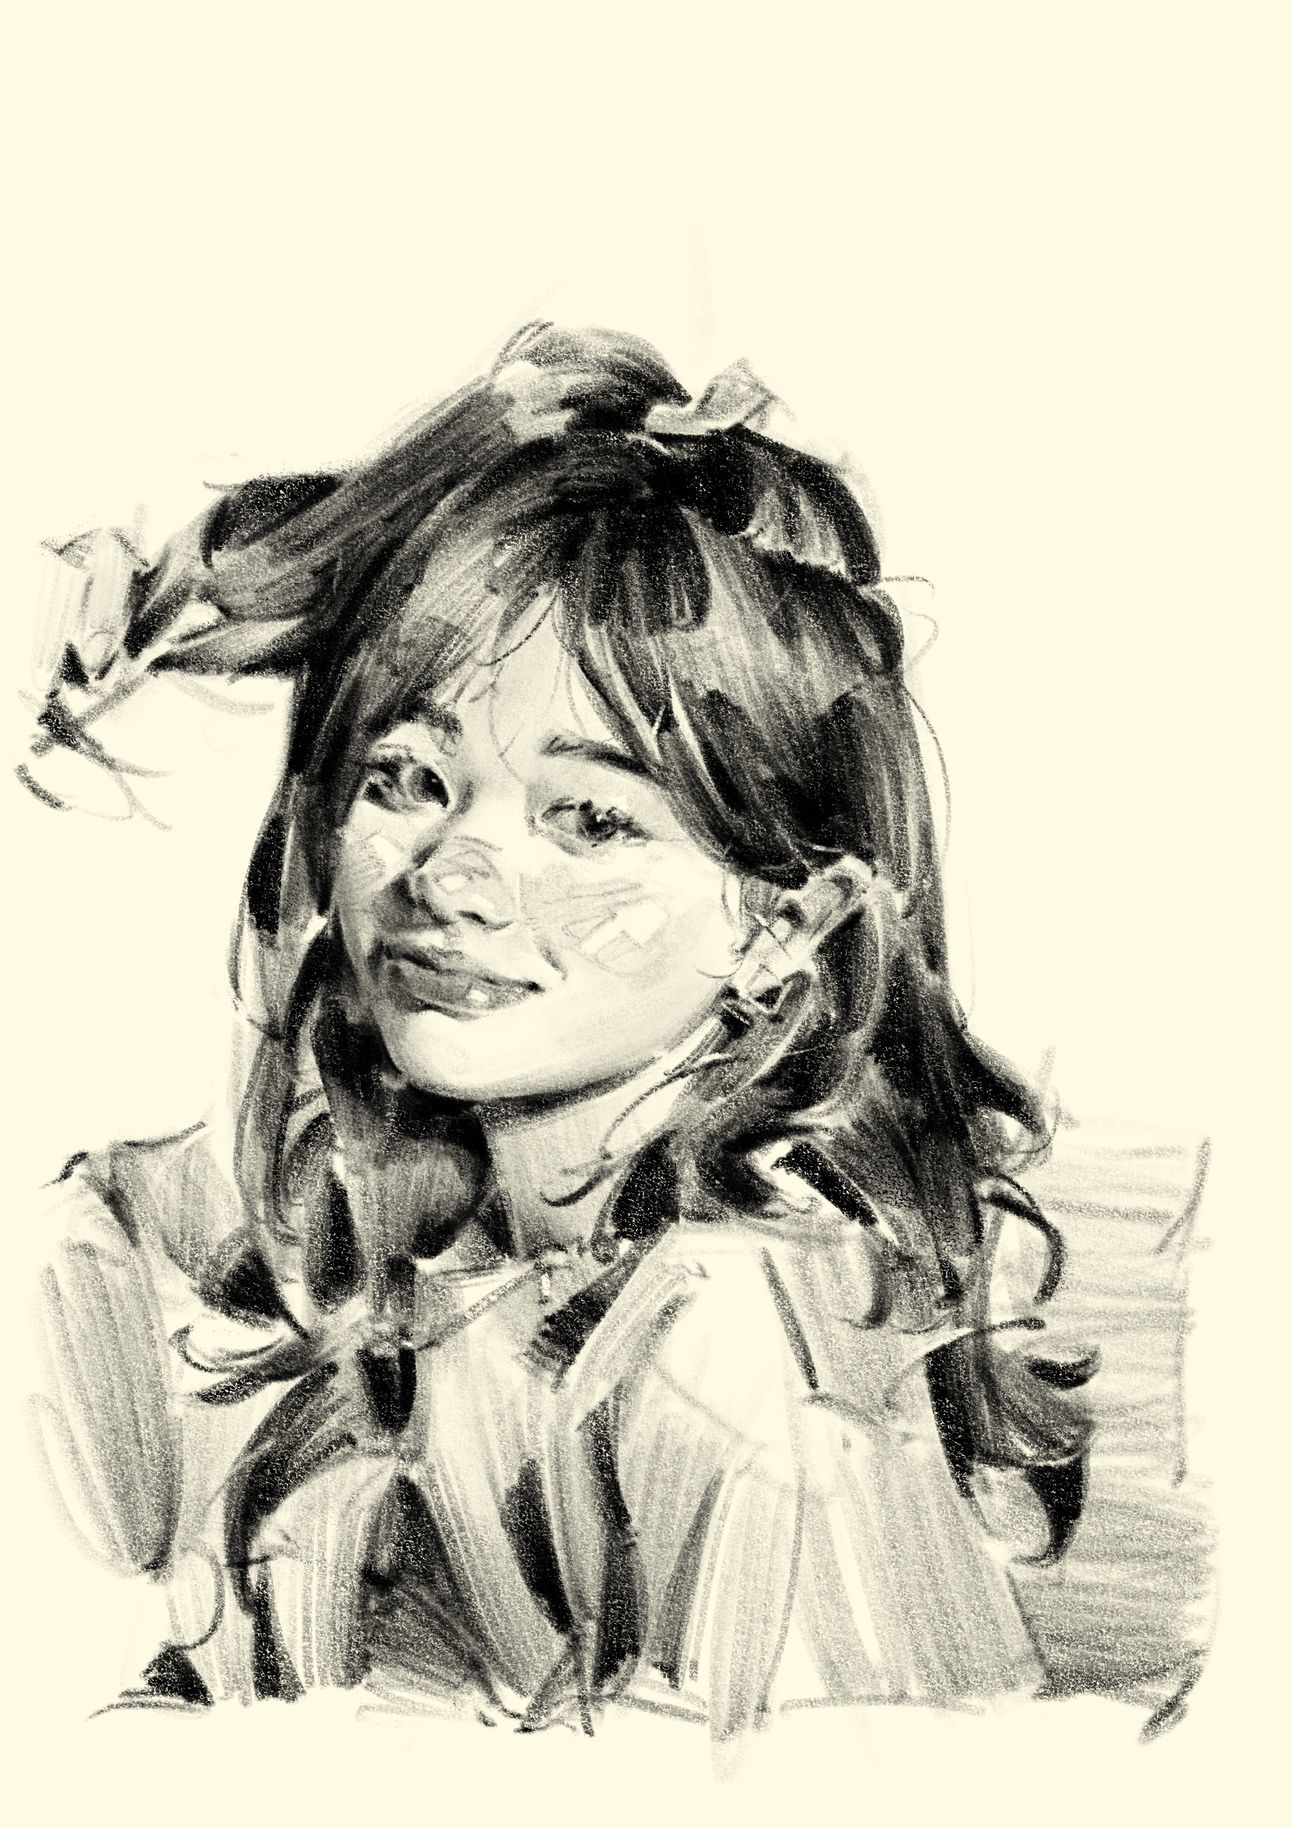
Final Thought Structure doesn’t make the drawing stiff— it actually gives you freedom to focus, express, and simplify.
Some of you asked last time whether I use real models or not— and the answer is: most of my drawings are based on photo references. The sketch in this issue, for example, came from this Pinterest image.
As always, if you have questions about the process, tools, or anything else— feel free to reply to this email. Your questions often turn into new newsletter topics.